mud-masks

Earthy Facials

What if we told you that you could smear mud and clay on your face to wipe off dirt…eh, what? It seems ironic, but anyone who goes to spas will know that these facials are quite common. So, we’ll walk you through the benefits of these facials and provide you with 2 simple DIY recipes for homemade masks.

So, what exactly is a mud mask?

A mud mask is simply a paste which consists of some sort of mud (duh) or clay, among other ingredients. Most of these mud packs are available as off the shelf products. The types of mud often used are Fuller’s Earth, Volcanic Ash mud, Black mud, Dead Sea mud, and so on. The thing with mud masks is that they are primarily hydrating and cleansing agents. They are to be used if your skin is dry and dull. They are used to improve blood circulation under the skin, to clean off dirt and other impurities. Moreover, mud masks are also used to tighten your skin and give it a softer, younger appearance.

And what’s a clay mask?

A clay mask is similar to a mud mask. Heck, if sources on the internet are to be believed, even the so called mud masks use certain clays as primary ingredients. But the number one difference between mud and clay masks are that clay masks are used with oily skin. A clay mask is a drying agent, so it’s used to absorb out excess oil from your skin. The different kinds of clay used for these masks are Bentonite Clay, Moroccan Red Clay, French Green Clay, and so on. Also, it has been observed that a clay mask is not as gentle as a mud mask, so it is allowed to remain on your face for a shorter duration as compared to a mud mask.
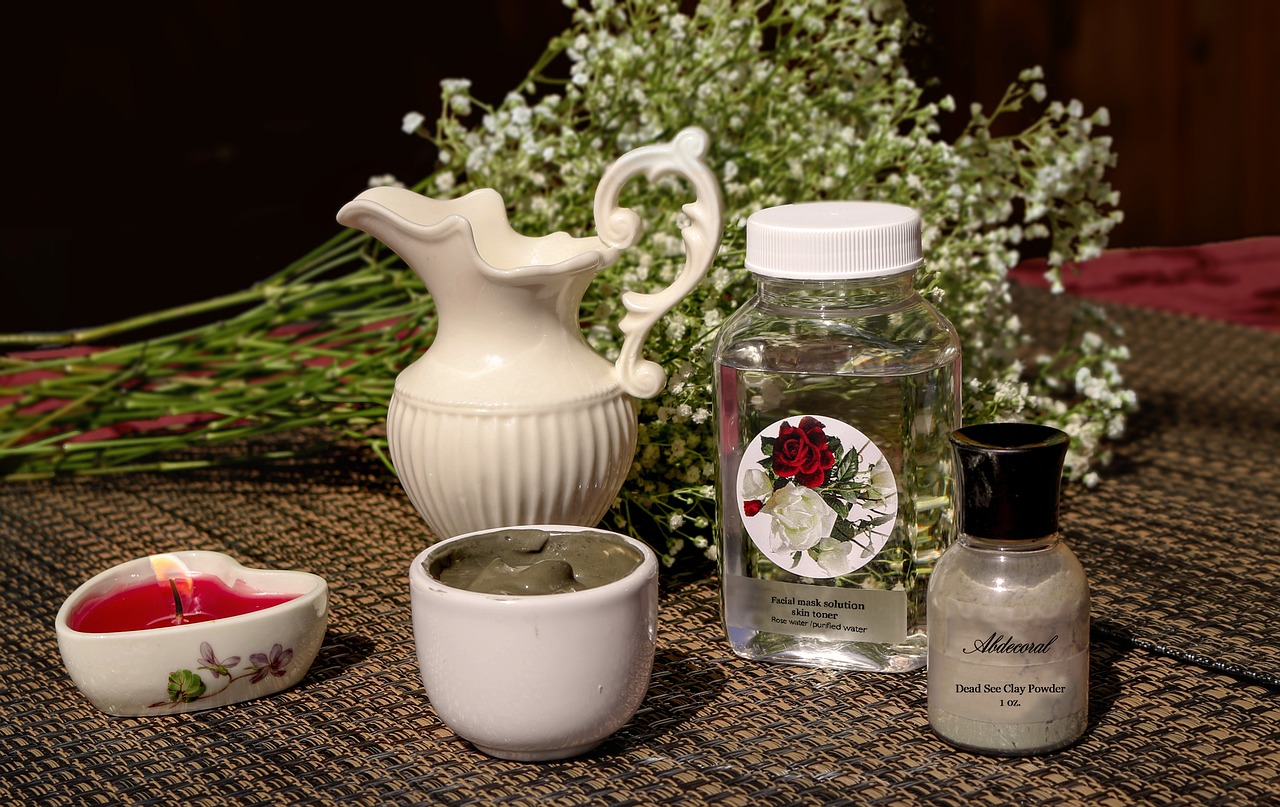
Dead Sea Mud Mask

The mud referred to here is literally the mud found in and around the Dead Sea. Dead Sea mud is very mineral-dense and therefore, is beneficial for your skin, making it a popular choice for a face mask. You’ll find plenty of recipes for making a Dead Sea mask with different ingredients (different oils, specifically), and I’ve given you one below. Feel free to experiment with different kinds of oils used for this mask.

So, here’s what you’ll need for a simple DIY mud mask –

  • About 5 mg (1 teaspoon) of Dead Sea mud
  • 4 drops Myrrh essential oil
  • 2 drops Frankincense essential oil
  • A few drops of coconut or olive oil
  • A bowl and a spoon

Ready? Now, do the following –

  1. Wash your face, and remove any makeup that you might have on. Take a small towel or cloth and dampen it with warm water. Put it on your face and leave it there for about 30 seconds. Do this once more. This is said to open up your pores and help in the cleaning process.
  2. Now, in a bowl, mix 2 drops of Frankincense essential oil, 4 drops of Myrrh essential oil, and 1 teaspoon of Dead Sea mud.
  3. Apply a few drops of coconut/olive oil to the skin just around your eyes, since this is a sensitive area. Don’t put the mud there.
  4. Apply the mixture from step 2 to your face. Spread it uniformly on your face to form a thin layer of the paste. Avoid the area just around your eyes.
  5. Relax for about 20-30 minutes and let the mask be. Lie down and listen to some soothing music. Or read a book. Also, avoid twitching your face or making any gestures while the mask is on.
  6. Using warm water, gently wipe the mask off your face.

Bentonite Clay Mask

Things you’ll need –

  • 1 teaspoon of Bentonite clay
  • 1 teaspoon of raw honey
  • Half a teaspoon of powdered Calendula and Chamomile flowers
  • 2 drops of lavender essential oil (optional)
  • 1 teaspoon of water

The steps for making and applying the mask are similar to that of the Dead Sea mud mask, only that the mixture for making the mask will have different ingredients, and the mask will remain on your face for about 15-20 minutes.

Soothing Hands

So often when we think about pampering ourselves, the hands are not of first thought. We think massage, body wrap, facial, even feet, and the neglected hands get left out.

Our hands need a little love too. Soothing the hands with a scrub and deep moisture treatment will not only create a relaxed feeling, brighter skin, but also help calloused, rough hands.

Exfoliating hand scrubs are great for both men and woman, and especially men that put their hands to work. My husband’s friend is a plumber in Arizona. Not only are his hands brutalized from his job, but the heat of the dry Arizona summer doesn’t help his already chapped, calloused hands. Inspired to give him a recipe to help soothe is hands, we thought we would share on our site as well.

This at home soothing hand treatment is meant to exfoliate, soften, and moisturize rough hands.

Scrub Ingredients (exfoliation):

3 TBS Coconut Oil

1 Lime

1 cup Sugar Raw Sugar

Mint sprigs

Warm towel – moisten a towel and place in the microwave. have it warmed and ready to use after your exfoliation scrub and before your moisture session.

Moisture Ingredients: (After Scrub) This is a recipe to make your own. Prep before scrub so it is ready.

1/3 cup almond or grapeseed oil

1/2 cup beeswax (grated) – found at you local health food store or arts and crafts store

6-7 drops Essential Oil of Choice (we like lavender oil for calming/soothing and citrus oil for brightening/freshness)

1-2 tsp Vitamin E oil

  • Step 1 – Exfoliate

Raw sugar aides in deeper exfoliation. We highly recommend raw or turbinado sugar for a deeper exfoliation.

The coconut oil should be in liquid form. If it is in solid form, just microwave it briefly to liquify it.

Mix all of the above ingredients together. Once everything is nicely mixed, apply the scrub to the hands. Massage the hands together, working areas that need a bit more scrub love. You can even work your way up the forearms. If your knuckle area is dry, spend a little more time there. Work the scrub with your gentl massage for 3-5 minutes.

  • Step 2 – Warm Towel

Place warm towel over exfoliated hands. Let sit for 1-2 minutes. Remove and dry hands to prepare for moisturizer.

  • Step 3 – Moisturize ( prep before scrub)

Mix Almond or Grapeseed oil with vitamin E oil and essential oil

Measure your beeswax in a glass container. Gently warm the glass container in a bowl of hot water to melt the was. Mix with above ingredients. Make sure to fully mix well. Let sit and solidify.

Apply a generous portion to hands that have been exfoliated and allowed to sit with a warm towel. Apply the lotion mixture up the forearms. Work in between fingers to get all of the crevices of the hands.

The moisturizer and exfoliator are alss great for the feet…so don’t be shy to give the feet a little love too.

yoga-breathing

Your at Home Yoga Practice

The Benefits of Yoga

  • Flexibility
  • Muscle Tone
  • Strength
  • Improved Breathing
  • Balance
  • Joint Health
  • Pain prevention
  • Stress Reduction
  • Body Awareness
  • Sleep Improvement

The benefits of yoga range from physical to mental benefits.  Our bodies are the vessels in which carry us through life.  Yoga can help to strengthen, calm, and improve this vessel.  Many of us do not even stop to take a deep breath once, all day long!  Breathing is a fundamental part of yoga, really of life.  Deep breathing not only improves lung function but takes the body from the sympathetic nervous system control to parasympathetic nervous system control.  This system keeps our body in a more relaxed or “at rest mode”, decreasing blood pressure, heart rate and stress hormones.

This is just a look at some of the in depth benefits of what yoga can bring. So why not explore a gentle home practice, even if it’s only once or twice a week. Set aside 20-30 minutes for some light yoga and deep breathing. 

This article will begin with a breathe practice. Breathing is the essence of yoga and plays a major role in how the body responds to what we do. The breath allows us to tune inward and discover a space of peace.

10 minutes of yoga breathing.

To begin find a space that has a little room and some quietness.

Sit upright in a comfortable seated position.

Soften your shoulders and keep your eyelids gentle closed.

Begin by taking 3 deep breathes.

For the next 5-7 minutes you will slowly and deeply breath into your  belly, then your chest. You want to allow your belly to expand outward and then your chest

On your exhale, allow your belly to begin to deflate and draw inward as you exhale the air out of your chest.

Repeat. Be very aware of your breathing and how you are feeling. Do you feel slightly constricted or free. Do not force the breath, but allow yourself to find a natural flow. Breath with intention.

If your mind loses focus of your breathing and tries to scramble around to find other things to think about, reel it back in. It may not be easy at first, but allow it to be what it is. Keep you intention of following the breath.

Now take 3 more deep inhales and exhales. For the next 2-3 minutes, breath naturally in and out. Do try to fill the body with air. Feel the breath move into the shoulders, the legs, the feet, but without force. In and out.

Gently open your eyes. Stand up and lift your arms overhead as you take an inhale. On the exhale release the breath and the arms towards the floor.

How do you feel? If you have 2-3 minutes to briefly note how you feel or an thoughts that came to mind, please take the time to do so.

We will soon follow with a short yoga movement sequence.

If you have questions. please feel free to reach out.

Namaste~


Halotherapy – Salt Therapy

Some of you may have heard about the benefits of a Salt Cave or Salt Room. Halotherapy (Halo the Greek word for Salt), also know as Salt therapy, has many therapeutic benefits, including those that aide with respiratory illness, lung issues, allergies, and skin diseases.

Although the benefits of salt mines or caves were first discovered in the mid 1800’s, and Europeans have sought out salt treatments since that time, Salt Caves are now beginning to gain trend and popularity in the United States and Canada for the numerous health benefits they offer.

How does Salt Therapy Work?

Salt particle are negatively ionized and have high levels of kinetic energy, allowing the particles to penetrate deeply into the lungs and airways. Because of salts healing qualities, those that experience this deeper level of penetration, receive the healing benefits salt offer.

More and more salt therapy rooms or salt caves are beginning to open up across the U.S. and Canada. While recently visiting family in Fort Collins, I stopped into the Sanctuary Spa (www.fortcollinsspatreatments.com) and was able to have my first salt spa experience. Their salt room consists of 2000 lbs of Himalayan Sea Salt. I basked in salt for nearly in hour and came out feeling very stimulated, and awake.  I did cough a bit more for the following few hours, but I was told that is a sign of a lot of mucus and it was healthy, the body’s way of eliminating what needed to be.

Salt Therapy for Your Home.

Now this site is about how we can bring day spa services and treatments to our home, without the need to travel to a day spa. I would like to give you a few tips on how you can create mini salt therapy sessions from the comfort of your home.

Salt Lamps are what we are going to recommend to purchase from your local store that carries them, or from Amazon. Do you homework to find a good one.

Although Salt Lamps are not an actual whole room, we are going suggest how you can make a space in your home your own salt room with a few salt lamps. Salt Lamps in general can offer cleaner air and a more therapeutic space. Not only will you benefit from their healing aspects, but also from the soft glow that they put off to induce you into a sense of relaxation.

What you will need:

A designate a space or one room of your home., your place for relaxation.

Salt lamp or lamps.

Next get a lavender eye pillow (optional)

Yoga mat, blanket, or bolster.

Have your lamp/lamps plugged in. Options to Sit, lay down in a supine position (on your back), or support your mid back with the bolster in allow yourself to be in position that opens the front body.

Place your eye pillow over your eyes (if you have one).

Begin to focus in your breath, breathing in a little deep and slower than normal. Allow you exhalation to be nice and slow and long.

If your might is trying to chase thoughts, let it be. Just try and not attach to those thoughts by focusing on your breathe.

You will remain in this position for 20-45 minutes, depending on the time that you have. Try and do this 2-3x/week.

After your session we suggest journaling for 3-5 minutes about your experience and how you feel.

We hope you enjoyed your session!

Rose Water

When it comes to wellness, hydration and that healthy glow we all crave, Rose Water is one of the most widely used elixirs as a hydrating toner and natural skin refresher.  Here at Diana’s Day Spa we promote and use it frequently.  What most however don’t know is how good it is for your insides too when ingested!  That’s right one of our little spa secrets that we want to share with our online spa guests is that Rose Water is amazing for creating that rosey hydrated glow from the inside out. In fact it has numerous positive effects on our bodies when ingested.

  Consuming Rose Water on a regular basis helps flush out break out causing toxins leaving your skin clear and healthy.  Also known for its amazing effects on your digestive system.  Because rose water naturally flushes toxins out of our bodies our digestive systems are able to work flawlessly.  In turn our immune systems are boosted because there is no extra strain on the body to function properly.  Rose water is also known for it’s anti-inflammatory capabilities as well as it is a natural antibacterial healing antiseptic.  Still there is more that Rose Water offers our bodies and mind!  Rose water is a known mood enhancer and has calming abilities to help us relax and de-stress.

There are many ways you can incorporate rose water into your daily routine and you will soon be amazed at all the positive effects it has on your body.  Having a get together with the ladies?  Make fresh lemonade with rose water.  Or perhaps add it to champagne to help stay refreshed from the dehydrating effects of alcohol!  We encourage you to use it both for external skin care as well as the wellness flourishing effects it has on our insides too.

To make your own rose water elixir at home follow the recipe as listed.  It is such a simple thing to make with almost no time spent at all.  The amazing effects you start to see and feel will have you thanking us for this amazing secret!


       Rose Water Recipe

1 cup firming packed rose petals

2 cups boiling hot water

Let steep until water is cool

Get all water out of rose petals

   Strain into a spray bottle for face

       Keep in the fridge in a mason jar for adding to recipes!

Welcome

Welcome to Diana Day Spa, our online relaxation spa. Our goal is to provide our readers with all of the necessary information to turn any day into a spa day.

One of the most frequent things we heard from our clients was, “we wish we could take you home with us.” We began to think, well why can’t we make that happen. Hence our idea of an online spa emerged and this platform was born.

We will provide you with at home treatments for your body, mind, and skin. Whether you have only 5 minutes out of your day to dedicate to your spa retreat, or 3 hours, we want to provide the resources for you to accomplish either. Pampering for five minutes is better than no minutes.

Learn to indulge yourself from the comfort of your home at dianadayspa.com.

Our services aim to relax, renew and invigorate the body and mind. We will offer self massage techniques, body scrubs, facials, and practices to quiet the mind. You can wake up every day and perform one of our services, get together with a bunch of friends and have a service day for one another, or take a full day to your self to pamper and relax.

Not only are our online services meant for those of you that are too busy to take them time to actually visit a day spa, they are also meant for those trying to save money or on a budget.

As nice as escaping everyday life, chores, family and kids is ideal once in a while, it is not always a true option. Let us provide you with an alternative.

We hope you enjoy our services!

RELAX. RENEW. REJUVINATE.